|
|


Purgatory Towers
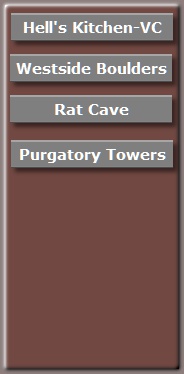
1. ***V2 Magic Crystal Stand start the crack and press
around the corner to a slab then traverse the crack around the
corner and back down the far face. The crux is rounding the
first corner.
2. **V2/3 Start on a pinch and head up the slopey arete. A short problem.
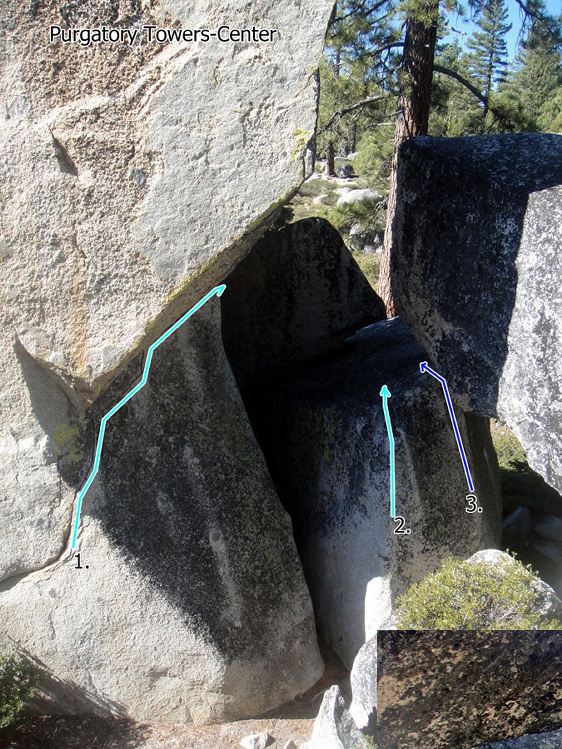
3. *V1 At the slopey bulge under the roof start matched on a good crimp then up. Watch you head on the topout.
4. ***V3R Lean & Mean A powerful sparse slab. Start matched on a micro crimp then make a move out right to a good crimp then head up. The landing is bad in spots.
2. **V2/3 Start on a pinch and head up the slopey arete. A short problem.
3. *V1 At the slopey bulge under the roof start matched on a good crimp then up. Watch you head on the topout.
4. ***V3R Lean & Mean A powerful sparse slab. Start matched on a micro crimp then make a move out right to a good crimp then head up. The landing is bad in spots.
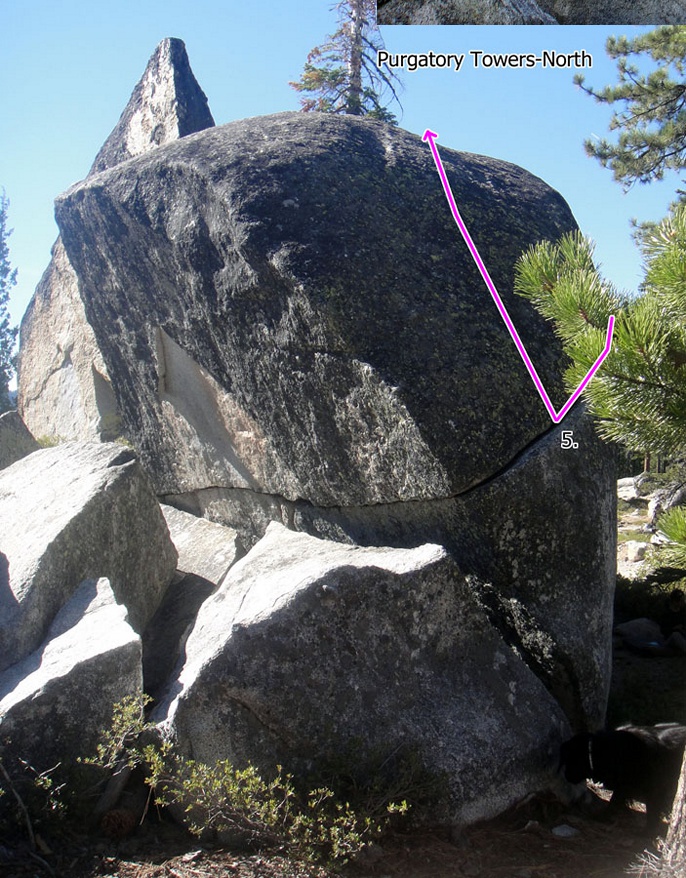
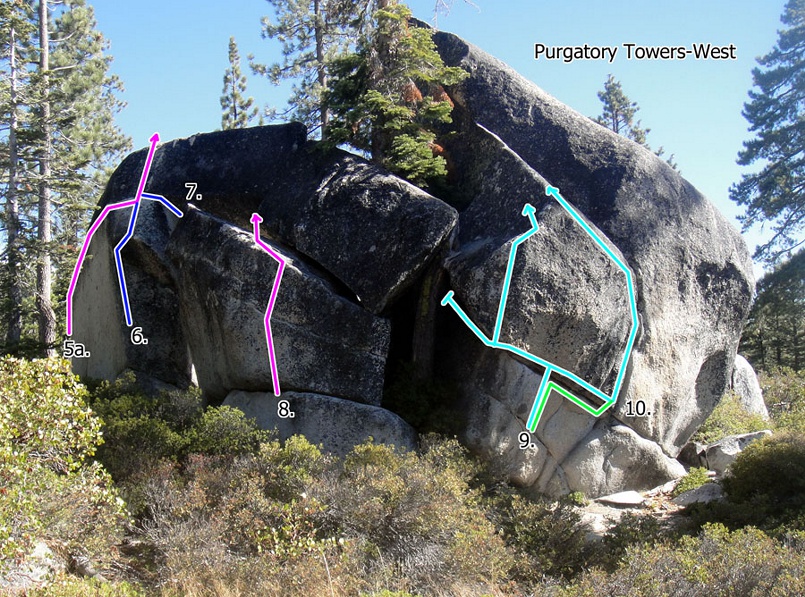
5. **V0 Start on the good horizontal
rail and pull up onto the slab.
5a. V0!? Work the long high jug horizontal with no feet right to a high topout.
6. !V2R? I was too chicken to try this one. Start start on the block and head up the slab over the little roof and up. With the block under you, I don't recommend falling on this one.
7. !V2R? Here's another one with a less then ideal landing. Start on the far side of the corridor and work the crack at the corner of the roof up and left to top out as #6 .
8. **V0 SDS on the good horizontal rail and head up through some more.
9. ***V4 The Worm Direct SDS on the lower rail, pop up to the higher rail and head out left under the roof and around the corner along a finger crack and end by the second tree.
9a. V4! The Squirm Direct Start as the Worm Direct, but when you get to the corner head up the arete and top out.
9b. !V5R? Weary Monster Same start, but head down the rail to the right and into Scary Monster (#10b)
10. V4? The Worm Traverse the rail left and around the corner into a finger crack. End in the corridor by the second tree.
10a. V4? The Squirm Traverse the rail left until you hit the arete then head up.
10b. !V3R? Scary Monster Stand start the crack the rolls out into a high slab.